Happy cold diving! If you're new to this energizing practice or just received your Titan Cold Plunge, you're in for a treat. Cold plunging, also known as ice baths or cold water immersion, has been gaining popularity for its numerous health benefits, including improved circulation, reduced inflammation, and enhanced recovery. In this guide, we'll walk you through the steps of setting up your Titan Cold Plunge, finding the right temperature, determining your plunge duration, and making your cold plunge experience as relaxing as possible, whether you choose to use it indoors or outdoors.
Although your first cold plunge is an exciting event, following the correct cold plunge instructions will help ensure a seamless recovery. Start with a beginner cold plunge temperature. Your body will try to control its temperature as soon as you leave the water; hence, you may have a tingling or numbing sensation on your skin, but your body will adapt with time and consistency, making the next plunges more pleasant and easier.
Step 1: Setting Up Your Titan Cold Plunge
Before you begin your cold plunge journey, ensure it is set up correctly:
Find a Level Location: Choose a stable, level surface that can support the weight of the filled tub. Consider your long-term placement – will it be indoors or outdoors? Make sure the area is well-ventilated and easily accessible.
Fill with water: Follow the included instructions for securely attaching the lid and fill valve. Add cold water, either using a hose or buckets. Adjust the water level according to your preference, keeping in mind that you'll need enough depth to fully submerge yourself.
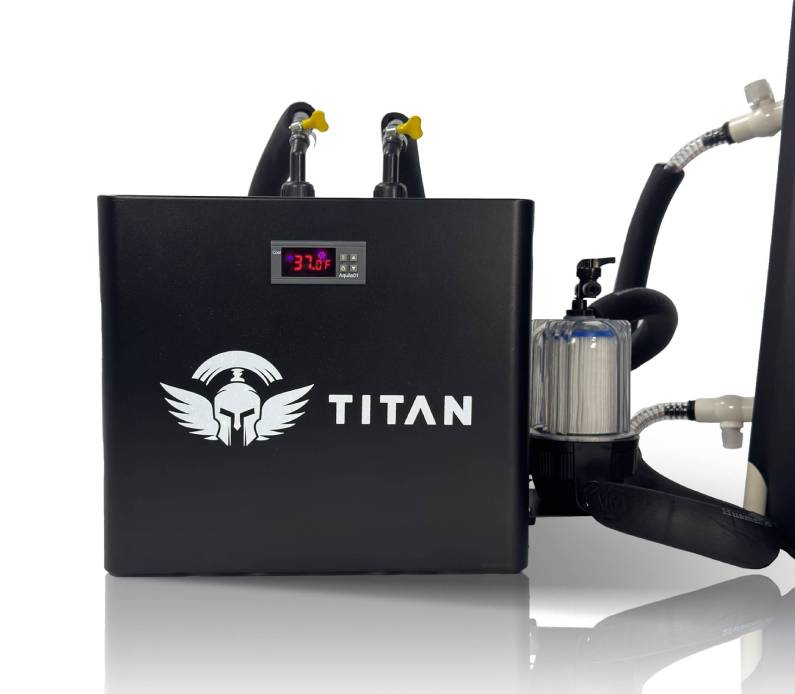
Utilize a Chiller (recommended): For consistent and convenient cold water, invest in a Titan chiller. It eliminates the need to constantly add ice and minimizes long-term costs compared to using ice regularly. Simply connect the chiller to a power source and turn it on.
Connect the power: If you go for a Titan chiller, make sure it's connected to a power source and turned on. Since it uses the same compressor and runs on a standard 110V US plug, it won't significantly increase your monthly power costs compared to your refrigerator or freezer. Before installing your system, double-check the instructions that come with it.
Step 2: Finding the Right Temperature

The ideal temperature for your cold plunge will depend on your tolerance level and the desired therapeutic effect. Here's a general guideline:
- Beginners: start with a water temperature between 50°F and 60°F (10°C to 15.5°C). This temperature range provides a refreshing cold plunge experience without being overwhelming.
- Intermediate Users: As you become more used to cold plunging, you can gradually decrease the water temperature to as low as 41°F (5°C) for a more intense cold exposure.
- Advanced Plungers: Experts may go into even colder water, but be careful and listen to your body. Use your polar bear thermostat to measure the water temperature accurately before each plunge. Adjust the temperature according to your preferences and comfort level.
Step 3: How Long Should You Stay In
The duration of your cold plunge session will vary depending on your experience level and the water temperature. Here's a guideline to get you started:
- Beginners: Start with a short plunge duration of 1 to 3 minutes. As you become more accustomed to the cold, you can gradually increase the time to 5 minutes or longer.
- Intermediate to advanced: Aim for a plunge duration of 5 to 10 minutes, depending on your tolerance level and the therapeutic goal.
Listen to your body and pay attention to any signs of discomfort or numbness. If you start feeling too cold or experiencing shivering, it's time to end your plunge session and warm up. Make sure to consult your doctor before starting cold plunge therapy, especially if you have any underlying health conditions.
Step 4: Making Your Cold Plunge Experience Relaxing
If you want to make your ice bath more fun and memorable, try these suggestions:
- Create a relaxing atmosphere: Play soothing music, lower the light, or use aromatherapy diffusers to create a calming ambiance.
- Practice deep breathing: Take slow, deep breaths to relax your body and mind during the plunge. Focus on inhaling deeply through your nose and exhaling slowly through your mouth.
- Use visualization techniques: Imagine yourself surrounded by peaceful scenery or visualize the cold water washing away tension and stress from your body.
- Enjoy the outdoors: If the weather allows it, take your cold plunge outdoors to connect with nature and enjoy the beauty of your surroundings. Set up your Titan Cold Plunge in your backyard or garden for a refreshing al fresco experience.
Beginner Cold Plunge Temperature
Embarking on a cold plunge journey offers more than just physical benefits; it can also enhance your mental resilience. As you adapt to the invigorating chill of a beginner cold plunge, you may notice improvements in your mood, stress levels, and encouraging mindfulness as the intense cold requires you to focus. Understanding the ideal beginner cold plunge temperature can help you ease into the practice comfortably and effectively. Diving into the world of cold plunge therapy can seem daunting for first-timers. But fear not; at Titan, we bring you a cold plunge guide, where we answer and explain beginner cold plunge temperatures and many other questions. Remember, the goal is not to shock your system but to introduce it gently to lower temperatures. As you progress, you’ll find your tolerance for colds increasing, allowing you to reap the full benefits of this age-old wellness practice.
Embrace the Power of Cold

It is great that you have decided to start cold plunging as part of your wellness practice! With this detailed tutorial, you'll have no trouble setting up your Titan Cold Plunge, selecting the ideal plunge temperature and duration, and having the most relaxing experience imaginable. No matter where you decide to use your cold plunge, it's important to pay attention to your body, stay hydrated, and enjoy the rejuvenating benefits of this practice.
Now that you have your Titan cold plunge tub and this helpful guidance, you are prepared to overcome the chill and experience the benefits of cold water therapy. Happy plunging!
Cold Plunge Instructions
We hope this guide about how to start cold plunge is helpful for you to start cold therapy and take advantage of all of its wonderful mental and physical benefits. If you are new and need more cold plunge instructions and orientation, don’t hesitate to contact us to help you choose the best plunge tub for your needs. Don’t forget to listen to your body and keep all your Titan accessories handy to make your experience more pleasant.


